21 November 2015

DIY Christmas calender for kids [Tee-ise advendikalender lastele]

When I was a kid, the christmas calender was a big hit in our home. Every year we waited, if there is coming one and how does it look like.

My own kids are waiting the gnomes more than calender. So therefore we haven't made or bought any calendars for home. But this year I decided to make one my own. In the internet, there is a lot of ideas what to do.

Here are some ideas.

Kui ma veel laps olin, siis meie peres oli suur hitt advendikalender. Igal aastal ootasime, kas päkapikud toovad sel aastal ning milline see täpselt välja näeb.

Minu lapsed ootavad rohkem päkapikke kui kalendrit. Kuna neil suurt vaimustust pole neist tekkinud, siis pole meil vist kordagi neid kalendreid koju sattunud. Sel aastal aga mõtlesin ise teha. Internetis on ikka hulk vahvaid ideid mida teha.

Ja siin mõned näited.


Simple and easy - printable black&white boxes for christmas calendar. You can find the template and tutorial here.

Lihtne ja kergesti teostatav - prinditud must-valged karbid on muudetud kalendriks. Siit leiate ka juhendid ja šabloonid.


Or you can use just toilet rolls and make those adorable gift boxes.

Või lihtsalt kasutada tualettpaberi rulle ning meisterdada nendest sellised armsad kingikarbid.


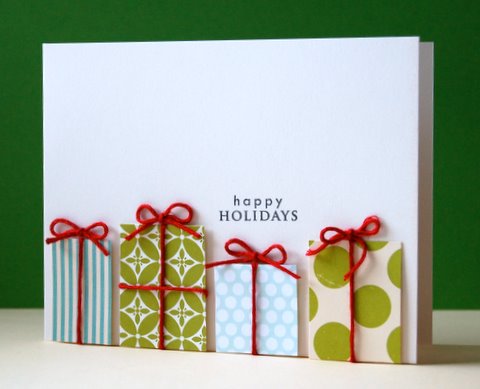
If you have more than 1-2 kids home, then you can do bit bigger boxes and create a beautiful christmas calender as arrangement.

Kui sul on kodus rohkem kui 1-2 last, siis võid juba teha ka suuremad karbikesed ning need sättida omakorda kaunistuseks.
Or you can be even more creative and make little gnome houses and make a village out of them. Fun for the children and real eye catcher of a house.

Kui on isu olla veelgi loomingulisem, siis võiks teha sellised väikesed päkapiku majakesed ning moodustada nendest hoopis väike päkapiku külake. Usun, et lastele pakub see eriti elevust ning on tõeline pärl kodus.

I was thinking to do something like that, simple and elegant. You can cover the clothes pins with washi tapes or just paint them, or with glitter spray. I think it's great way to make unexpected suprises to each other and those little presents are just so adorable hanging there..

Ma ise mõtlesin midagi sellist teha, lihtne ja elegantne. Pesulõksud võib katta washi paelaga või lihtsalt värvida neid, kasvõi glitter-spreiga. Selline kalender annab hea võimaluse teha ka ootamatuid üllatusi üksteisele ja noh need väikesed rippuvad kingitused on lihtsalt ülinunnud..

What kind of christmas calenders are you doing this year? Or do you have already one?

Millised on teie selle-aastased advendikalendrid? Võin on teil juba aastaid olemas üks kindel?

18 November 2015

Time to make christmas cards! [Aeg meisterdada jõulukaardid]

When did you last got real mail or postcard from your mailbox (I mean the one in outside, where the real letters/newpaper are coming)?

My friend recently moved from our island to mainland and therefore they send us real postcard with handwritten greeting - it was sooo lovely!

Usually we get some christmas cards every year. It feels so nice to open the envelope and discover the beatiful card and read the bes wishes.

Well, at the moment, it is the best time to start doing your christmas cards!

Millal Sa viimati said päris kirja (arved ei loe!) või kaardi? Ma mõtlen ikka seda postkasti, mis asub seal, kuhu postiljon kirju toob :)

Mu hea sõbranna kolis hiljuti just mandrile ning selleks puhuks saatis oma kodulinnast ilusa postkaardi, kuhu oli käsitsi kirjutatud tervitus - üks toredamaid kirju viimasel ajal!

Üldjuhul iga-aastaselt mõned jõulukaardid meie postkasti satuvad. On ju päris mõnus avada ümbrikut ning avastada, milline kaart seal peidus on ning millised soovid on kirja pandud.
Ja mulle tundub, et just praegu on õige aeg hakata kaarte meisterdama, et nädala või veidi rohkem aja pärast nad lihtsalt posti panna.

For many years I have made stitched cards.

I have used some christmas tree ornaments or just a star and stitched with golden thread. Simple, but elegant.

Here you cand find free patterns, if you would like to try also.


Mitu aastat olen läinud tikitud kaartide teed. Olen kasutanud lihtsaid mustreid või lihtsalt kuldse niidiga tähekesi teinud. Lihtne, aga elegantne.

Siit leiad ka mõned tasuta mustrid, kui soovid proovida.


This years I was thinking to try something new. Here are some ideas:
Kuid sel aastal mõtlesin proovida hoopis midagi muud. Siin mõned ideed:


10 November 2015

Making of THE meaningful christmas tree [sõnumiga jõulupuu]

My posts about being art and craft teacher continues. Today is my last day in school and now few bigger projects are finished. I really love how things turned out - creative, fun and even useful tips for this holiday season. If I'd been longer in school, I even might let them create tutorials for others in two language to share them in internet. I think it's great idea for development, how to create instructions so that every person in world would understand.

Mõned postitused veel sellest, kuidas ma koolis kunsti- ja käsitööõpetajana uusi kogemusi sain. Õigemini täna ongi viimane päev, kui saan seda toredat tööd veel teha ja viimased suuremad projektid õpilastega hakkavad valmis saama. Väga toredasti kukkusid asjad välja - loovad, lõbusad ja isegi mõned kasulikud ideed ka selleks pühade hooajaks. Kui ma oleksin veidi kauem koolis, siis laseksin õpilastel koostada ka õpetused mitmekeelsetena, et neid jagada internetis. Ma leian, et on hea võimalus ennast arendada, koostades juhised nii, et iga inimene siin maa munal mõistaks üheselt.

I asked my 8th grade to do an sculpture with meaningful message.

8.klassil palusin teha skluptuuri, millel oleks tähenduslik sõnum.

It was really hard for them to think about the message, doing was much more easier.
Well the result is here - alternative christmas tree to save trees! :)

Raskem osa oli isegi sõnumi leidmine, ideede puudus, mida võiks meisterdada - seda polnud. Neid oli isegi rohkem kui vaja.
Igaljuhul tulemus on siin - alternatiivne jõulupuu, et vähendada puude raiumist! :)


Christmas tree with lights.
Jõulupuu tuledes.

09 November 2015

Paper mache tehnique [paber mulaaž tehnika]

As I have been art and handicraft teacher for last two months, it has been great opportunity to try new tehniques or just remember old ones. It has been great challenges to teach kids to be creative and encourage them to think outside the box.

My last project with kids is paper mache. I remember I did this tehnique when I was in elementary school, so it's like re-studying the tehnique again. At the moment I am really fascinated about it - you can almost do everything, literally everything - from masks til hats or sculptures. And really fun aswell for the kids.

Olen olnud viimased kaks kuud käsitöö- ja kunstiõpetaja, mis on mulle andnud head võimalused ja meeletult uusi kogemusi, erinevate tehnikate proovimiseks või siis lihtsalt meelde tuletamiseks. On olnud tõeline väljakutse õpetada lapsi olema loovad ja panna neid mõtlema väljaspool kasti.

Üks viimaseid projekte on olnud pabermulaažide tegemine. Ma ise mäletan, et tegin neid samuti algklassides, seega oli hea võimalus tuletada meelde vana hea tehnika. Hetkel olen suure kirega antud teema juures - saab ju selles tehnikas peaaegu kõike teha - alates maskidest, mütsidest ja lõpetades erinevate skluptuuridega. Ja lastele on lõbu laialt.


With 1th grade, we tried to do masks, with 2th grade we did hats and with 4th grade we did vases.
We used this paper mache paste:
1 cup of flour
2 cups of warm water
1 tbsp salt
PVA glue

For the maks and vases we used tissue paper, for the hat we used old newspapers.

Esimese klassiga tegime mardimaske, teise klassiga tegime martidele kübaraid ning neljanda klassiga vaase. Liimimiseks kasutamise järgmist retsepti:
1 tass jahu
2 tassi sooja vett
1 tl soola
PVA liimi

Maskide ja vaaside jaoks kasutasime salvrätikuid, mütside jaoks mitteläikivat ajalehepaberit.

Instructions

You will also need a base - for a hat we used small buckets and for vases just some bottles. Cover them with plastic bag or foil. So later you can take it out.

Tear up newspapers or tissue paper, place them on base and add the paste. Add several layers, between the layers let the work to dry (sometimes even more than 24 hours). As you understand - it can be very long project, but worth to try it.

Juhised

Lisaks liimimismaterjalile, on vaja ka aluspõhja - mütsi jaoks kasutasime näiteks väikeseid ämbreid, vaaside jaoks plastikpudeleid. Aluspõhi tuleb katta kas plastikkotiga või fooliumiga. Hiljem saad need lihtsalt eemaldada.

Rebi ajaleht või salvrätikud ribadeks, aseta need ükshaaval aluspõhjale ning määri peale liimi. Tee mitu kihti, kuid pea meeles, et lase erinevate kihtide vahel eelmisel kihil kuivada (vahel võib see aega võtta kuni 24 tundi. Nagu juba aru saad, siis see projekt võib võtta päris palju aega, aga tulemus on seda väärt.

And here are some results
Ja mõned tulemused

Hat base / Kübara algus


Mask / Mardimask


Hat done / Valmis kübaraga

04 November 2015

How to organise your life with 3 kids? [Elu kolmega]

This fall, when school started, The CHAOS came along the way. This year all of the children started kindergarden and school, and I was full-time job. In the evenings, started the real chaos - nothing was done right time, even not talking about cleaning the room or feeding the pet on time.

So we needed to figure out, how to plan our daily life, way that everyone is happy, all needed things are done and have plenty time for hobbies and family time.

So my husband suggested to do a week-schedule for each one of us. This plan is not for must-be, more like suggested schedule, how to plan our activites.

Me, as a creative person in our family, got the job to do the schedule.
It took me almost 4 hours to create it and discuss with each one. Here it is.
Each person have it's one coulour, so kids who does not read, can regonize their character.

We made it the end of September, so we have practised it a little bit more than a month.
And I can say that it WORKS, really works. Kids know what we expect from them and they know when is play-time and family-time. 


Sel sügisel kui algas kool, siis koos sellega tuli meie elamisse ka KAOS. Kuna sel sügisel kõik alustasid, kas lasteaias või koolis ja mina täiskohaga töötamist, siis õhtuti just oligi kaos - ükski tegevus ei olnud õigeaegselt tehtud, rääkimata tubade koristusest või lemmikloomade söötmisest.

Niisiis olime olukorras, kus vajasime lahendust selle reguleerimiseks, nii, et kõik on rahul ja õnnelikud, see juures kodused tööd oleksid tehtud ja jääks aega hobideks ja pere ühiseks ajaks.

Niisiis mõtles abikaasa välja, et peaksime tegema ühise ajakava. See plaan ei ole range kord, vaid pigem selline soovituslik ajakava, mida järgida, sest elus on ikka päevi ja olukordi, kus peame olema paindlikud. Nii oleme ka lastele selgeks teinud, et näpuga järge ei pea, aga õhtuks peavad asjad tehtud olema.

Mina, kui pere loominguline isik, sain selle ülesande enda kanda. Ajaliselt võttis see aega umbes 4 tundi, et kõigi vajadused kirja panna. Igal ühel on oma värviga karakter, et need kes lugeda ei oska, saaksid ka aru, mida neilt oodatakse.

Selle plaani me koostasime septembris, seega oleme selle järgi toiminud veidi rohkem kui kuu. Ja võin julgelt öelda, et see toimib, tõsiselt toimib - lapsed teavad, mida neilt oodatakse ning millal on nende mänguaeg ja pereaeg. 

What are you cooking tonight? [Mis täna söögiks on?]

"What's for dinner?" asks my children every single evening. "Nothing new" are children saying when I tell them what I am cooking.
Well, tonight will be "something new"! Just randomly found in my fb timeline. Great idea!

"Mis õhtusöögiks on?" uurivad igal õhtul lapsed. "Ah ei midagi uut" vastavad nad mulle, kui räägin, mida täna süüa teen.
Igaljuhul, täna on midagi uut. Täiesti juhuslikult rändas fb-s minu ajajoonele. Tore idee!

Easy bacon-cheese-potatoes:
Slice the potatoes ( don't cut all the way throught)- see the pictures below, add bacon and onion slices between sliced potatoe.
Brush with oil. Cook in the oven 170-180 degrees for 30 minutes.
Add some cheese and cook 10 minutes.
And your done! Enjoy with fresh salad :)

Lihtne peekoni-juustu-kartulid.
Viiluta kartulid (ära lõika täiesti läbi) - vaata pilti altpoolt, lisa peekoni ja sibula viilud kartuli siilude vahele. Pintselda õliga. Küpseta ahjus 170-180 kraadi juures 30 minutit.
Lisa kartuli peale juustu ja küpseta veel 10 minutit.
Ja valmis ongi! Naudi koos värske salatiga :)

01 November 2015

Father's Days is coming [Isadepäev on tulemas]

Every year our kids are doing cards for dad and I'm looking somekind on gift for him. The truth is, that the gift part is the most difficult. The cards are easiest.

I gathered here some great cards ideas and some thoughts of gift. Maybe you can find here something aswell.


Igal aastal on meie peres lapsed teinud isadepäevaks kaardi ning minule usaldatud siis kingiotsisimine. Kui kui aus olla, siis kingi otsisimine ongi kõige keerulisem. Kaardi meisterdamine on käkitegu.

Igaljuhul kogusin siia mõned toredad kaardi ideed ja mõtted, mida võiks kinkida. Võibolla leiate isegi siit mõne hea idee!


The cutiest gift from Anna Lutter
Kõige nunnum kink

This will suit to our dad.
Sobiks hästi meie issile

Last, but not least a mug cake from Table for two blog - easy suprise for dad's!
Viimaks, tassikook blogist Table for two - lihtne üllatus isale!


Ingredients/koostisosad:
¼ cup all-purpose flour/ veerand tassi jahu
2 tbsp. unsweetened cocoa powder / 2 tl kakaopulbrit
¼ tsp. baking powder / veerand tl küpsetuspulbrit
2 tbsp. granulated sugar (you can add 1 tbsp. more if you like it a bit sweeter) / 2 tl suhkurt
⅛ tsp. salt / veerand tl soola
¼ cup + 1 tbsp. milk / veerand tassi piima
2 tbsp. vegetable oil / 2 tl õli
1 tbsp. hazelnut chocolate spread / 1 tl pähkli šokolaadi võie

Instructions:
In a medium bowl, whisk together dry ingredients.
Whisk in the milk and vegetable oil until all ingredients are combined and batter has no clumps.
Pour batter into a microwave-safe mug. Mine was a 14-ounce mug. You want enough head space for the cake to rise without pouring over.
Add 1 tbsp. of hazelnut chocolate spread in the middle of the batter. Just drop it in the middle, no need to push it down and sink it in the batter.
Place a paper towel into the microwave and set the mug on top (this is to catch any batter if your mug cake overflows).
Microwave mug cake for 70 seconds on high level.
Carefully remove from microwave and enjoy!

Juhised:
Keskmises kausis sega kõik kuivained. Lisa piim ja õli ning sega ühtlaseks massiks. Vala saadud mass mikrolaineahju-kindlasse tassi. Sobilik 400 ml tass - suurem tass on vajalik koogi kerkimiseks. Šokolaadivõie lase teelusikalt kukkuda massi keskele, ei ole vaja seda "uputada" või kinni matta.
Aseta mikrolaineahju, tassi alla tükk majapidamispaberit - see püüab üle tassi kerkivat tainast, juhuks kui peaks nii minema. Kuumuta tassi 70 sekundit kõrgemail kuumusel.
Võta tass ettevaatlikult mikrolaineahjust välja ja naudi!

31 October 2015

Table centerpieces for a special event [lauakaunistused eriliseks sündmuseks]

Few days ago, we had one beautiful evening with colleagues and I was organized it. My favorite thing of all is decorating the evening!

It all begun with a walk in woods. I gathered "some" moss and "few" wood pieces. Im glad that nobody saw me - it is not okay to pick woods in early Sunday morning :)
Then I cleaned the moss from thorns.

Mõned päevad tagasi, oli meil üks kena õhtu kolleegidega ja mina sain pearolli organiseerimisel. Muidugi kõige nauditavam osa oli peo dekoreerimine.

Algas kõik jalutuskäigust metsas. Korjasin "veidi" sammalt ja "mõned" puujupid. Õnneks, keeg ei näinud mind - ei ole vist väga normaalne pühapäeva vara hommikul tassida puid metsast autosse :)
Ja siis alustasin sambla puhastamist okastest - nii palju kui viitsisin.


Then I took some old newspapers and soft wire. I made some balls and afterwards added moss with 
thread.

Vanast paberist tegin pallikesed, neid vormisin pehme traadiga. Hiljem kerisin niidiga sambla ümber.
Ofcourse I needed something more to decorate the woods. I painted some cones with spray into white. I gathered red chokeberry leaves and berries and also made balls from newspaper. Afterwards just sprayd them into gold.

Muidugi oli veel kaunistuseks vaja erinevaid materjale. Värvisin mõned käbid valgeks. Aroonia punased lehed ja marjad sättisin samamoodi pallikeseks ning spreiga värvisin kuldseks.


And with hot glue gun all things onto one piece of wood. Beautiful, isn't it?
Well, the truth is that I made these table arrangemets 8 pieces. But only one left for my house.

Kõik kaunistused liimisin kuumaliimi püstoliga puujupi külge. Kaunidus, eksole?
Kui aus olla, siis tegelikkuses tuli selliseid lauakaunistusi kokku 8, aga ainult üks meie kodu jaoks.

27 October 2015

Meanwhile [vahepalaks]

As I am working on bigger project, it is great to see my sons work in school.. it seems that he has got at least something from me..
Kuna ma ise hetkel töötan suurema projekti kallal, siis on vahelduseks tore näha poja töid koolis.. tundub, et midagi on ikka minult ka päritud..

24 October 2015

Christmas is coming.. already? [Juba tulevad jõulud?]

My pinterest is full of christmas ideas - from cooking, decorations and last-minute-gifts. And it's October?! Really? In October? I haven't finished my Halloween decorations yet and already christmas are every where!

Minu Pinterest tahvel on umbselt täis erinevaid jõulu ideid - alates erinevatest söökidest, dekoratsioonidest ja lõpetades viimase-minuti-kingitustega. Ja on ju alles oktoober?! Nagu päriselt? Oktoobris? Ma pole isegi oma halloweeni kaunistusi lõpetanud ja juba on kõik kohad jõulukraami täis.

Photo from Pinterest

Well, true, it's only like 60 days til Christmas and I already started to knit some cozy presents, but I dont't think what to cook or how to decorate my house.

I even thought to try Haapsalu shawl, I even have a book in my shelf, but not yet. But I anvy people who can manage it. Here is Anete's beautiful shawl - you can her blog here.

Jah, muidugi on nagu mingi 60 päeva jõuludeni ja ma isegi alustasin juba ühe sooja ja mõnusa kingi kudumisega, aga ma veel kindlasti ei mõtle sellele, mida ma siis süüa teen või kuidas täpsemalt kodu kaunistan.

Seoses salliga, siis isegi mõtlesin korra, et proovin Haapsalu salli kudumist, sest raamat seisab juba aastaid riiulis, aga siiski mitte. Aga kadestan inimesi, kes sellega hakkama saavad. Siin on pilt Anete imeilusast sallist - tema blogi leiate siit.

Photo from Anete's blog

This year I just like to spend much time with  my family and gather some important people in my life  and have a great christmas dinner. I think gifts are not so important, but just to remember who are truly friends and important people in our lives.

Therefore you will see a lot of Christmas table decor photos and ideas.

Sel aastal tahaks rohkem rõhku panna oma perele ja olla koos toredate ja oluliste inimestega. Lihtsalt saada korra ühise laua taga kokku. Kinkimine ehk polegi enam nii oluline, aga just inimesed ise, sest reaalsust ja üksteisele silma vaatamist on järjest vähem.

Seepärast on peagi siin blogis ka palju pilte ja ideid tulemas..

Photo from Pinterest

21 October 2015

For a princess [printsessile]

One little princess is born and we went to see her. Therefore I made lovely owl mobile for buggy. As you can see, I used my owl pattern (see the previous post), skipped the wings and added just some wooden beads and elastic drawstring.

Super easy, it took only 2 hours to make it, but the result is amazing!

19 October 2015

DIY - Adorable owl free crochet pattern [Tee-ise - armas öökull muster]

I made this pattern over a year ago, but it is still my favourite pattern all time. Super easy and fast. Do it yourself or give it to your kids - you all can manage, if you know the basics of amigurumi.

Please notice! This pattern belongs to Kipre&Pähkla designers Kaie Pranno. Any kind of copying, reproducing or sharing is forbidden. Only for personal use.

Skill level – beginner
Finished size – The adorable owl is about 7 cm (2.75”) tall (if using similar yarn)

Supplies
1. Yarn – the example ise crocheted with Steinbach Wolle Capri (100% Cotton;50g = 125m; 1.75 oz = 136 yds)
Color A – pink
Color B – dark pink
Color C – light beige
2. Polyester fiberfill
3. Crochet hook 3,0 mm (U.S D or in accordance with the yarn you use)
4. Stitch marker
5. Black cotton thread
6. Darning and embroidery needles

About the pattern 
Work in continuous rounds. Do not join or turn unless otherwise instructed. It would be wise to use a stitch marker and place it in the first stitch of the round to mark the beginning of it. Move the marker up to the first stitch of the next round after finishing the previous one. If you need to change color, do it always at the end of the previous round. Start the last stitch of the round with the old color. Change the color right before you draw through all loops on hook to complete stitch. You can easily sew the toy together when you leave each piece a long yarn tail.

Abbreviations: 
Ch = chain
Sc = single crochet
Sl st = slip stitch
St (s) = stitch(es)
Inc = increase
Dec = decrease 3

PATTERN
OWL BODY 
Color A
Magic ring with 6 sc (6)
Rd 1: 2 sc in each st (12)
Rd 2: (1 sc, 2 sc in next st) rep 6 times (18)
Rd 3: (2 sc, 2 sc in next st) rep 6 times (24)
Rd 4: (3 sc, 2 sc in next st) rep 6 times (30)
Rd 5: (4 sc, 2 sc in next st) rep 6 times (36)
Rd 6: (5 sc, 2 sc in next st) rep 6 times (42)
Rd 7 – 10: 1 sc in each st (42)
Rd 11: (5 sc, dec) rep 6 times (36)
Rd 12: 1 sc in neach st (36)
Rd 13: (4 sc, dec) rep 6 times (30)
Rd 14: 1 sc in each st (30)
Rd 15: (3 sc, dec) rep 6 times (24)
Rd 16 – 21: 1 sc in each st (24)
Fasten off and leave long yarn tail for sewing.

Take Color B and embroidery needle. Embroidery V-stitches to owl’s belly. Start on 9th row (counting from bottom to top) and leave 4 st apart.

Stuff the body with polyester fiberfill and sew the top edge together.

WINGS (make 2)
Color A
Magic ring with 6 sc (6)
Rd 1: 2 sc in each st (12)
Rd 2 – 5: 1 sc in each st (12)
Rd 6: (1 sc, dec) rep 4 times (8)
Rd 7: (dec) rep 4 times (4)
Fasten off and leave long yarn tail for sewing. Sew the wings onto a body.

EYES (make 2) 
Color C
Magic ring with 6 sc (6)
Rd 1: 2 sc in each st (12)
Close the ring with sl st to next st.
Fasten off and leave long yarn tail for sewing.
Sew the eyes onto a body.

FINISHING 
Stitch on face and make ears tassels. To make tassels cut out the yarn strings (same height). Take your crochet hook and put it through the stitches. Pull all the strings through, now you have large loop. Put the hook away. With your finger, pull the strings through loop. Pull the loop tight. Trim the strings.

Your owl is done!

Feel free to share your owl with me! If you have any questions, you can leave comment here or write me kaie.pranno(ät)gmail.com

18 October 2015

Hats for two [mütsid kahele]

Cold weather comes always unexpected, so it was this year. And each year, there is huge problem - all hats, gloves and scarfs are either too small or just weared out.
I usually try to crochet everything, but this year I felt like knitting :)

Külmad ilmad tulevad alati ootamatult, pole erand ka see aasta. Ja iga aasta kordub üks ja see sama probleem - kõik mütsid, kindad ja mütsid kas on väikseks jäänud või lihtsalt koledaks kantud.
Üldiselt olen kõik asjad püüdnud heegeldada, kuid see aasta on kudumine kuidagi rohkem meeldima hakanud :)

So here they are. Girl's hat is knitted with lace, boy's hat is made with moss stitch.

Siin nad on! Tüdruku müts on tehtud lihtsa rombimustriga, poisi oma aga pärlkoes.

Well, there should be also third hat. Yeah, true, I made the third hat aswell, but few days ago we made a bonfire and you know - if you go to close to fire, you might get some sparks holes in your clothes - well the new hat got some sparks hole and now I need to knit new one :)

Muidugi peaks olema ju ka kolmas müts. Tõsi, kudusin kolmanda mütsi ka, kuid mõned päevad tagasi tegime lõket õue peal ja on ju teada, et kui liialt ligidal seista lõkkele, siis võid oma riietele saada sädemeaugud, nii juhtus ka tuttuue mütsiga. Nüüd tuleb lihtsalt uus müts kududa :)


17 October 2015

What inspires me [inspiratsioon]


Coffeeholic [kohvi sõltlane]


I love coffee. It's the first thing in the morning, definetly one must-be during the day and in the evening why not?

There are so many ways how to enjoy this hot (or sometimes even cold) drink. And as it is getting colder day by day - it's just perfect drink during this dark and cold time of the year.

Ma armastan kohvi! See on esimene kindel asi minu hommikul, "pean-saama" päeva jooksul ja "miks-mitte" ka õhtupoolikul?

On nii palju erinevaid võimalusi kohvi nautimiseks kuumana (või vahel isegi külmana). Ja kuna päev-päevalt on ilmad külmenemas, siis kohvi on minu arvates parim lahendus selle pimeda ja külma aja üle elamiseks. 

So I found out that Kimberly from A Night Owl blog has gathered 31 great recipes of coffee. Some of them I have already tried, but there is plenty of new ones.
First thing I want to try is Easy Peppermint Mocha. It sounds so simple, yet so good - just stir hot chocolate and coffee together, add 1 tbsp Perppermint syrup, milk and garnish with whipped cream and crushed peppermint candies. Sounds delicious, ah?

Ja täiesti juhuslikult leidsin, et Kimberly on oma blogis kogunud kokku 31 imelist kohvi retsepti. Mõnda neist olen isegi proovinud, kuid seal on veel palju avastamist! Eriliselt püüab mu tähelepanu Lihtne piparmündi mocca - lihtsalt segad kokku kuuma šokolaadi ja kohvi, lisad 1 tl piparmündi siirupit ja piima, peale garneeringuks vahukoort ja näiteks purustatud Marianne kommi. Kõlab ju hästi?

  1. Easy Peppermint Mocha {A Night Owl}
  2. Boozy Coffee Milkshake {A Night Owl}
  3. S’mores Iced Coffee {A Night Owl}
  4. Horchata Iced Coffee {A Night Owl}
  5. Easy Spiked Pumpkin Spice Latte {A Night Owl}
  6. Easy Caramel Mocha Latte {A Night Owl}
  7. Easy Homemade Iced Coffee {My Frugal Adventures}
  8. Nutella Blended Coffee Drink {Around My Family Table}
  9. Homemade Mocha Coconut Iced Coffee {How Sweet Eats}
  10. Italian Cream Iced Coffee {The Vintage Modern Wife}
  11. Coffee Frappe {Martha Stewart Living}
  12. Homemade Gingerbread Latte {Mom Advice}
  13. Iced Vanilla Latte {At the Picket Fence}
  14. Homemade Pumpkin Spice Latte {And Then There Were 5}
  15. Iced Mocha Latte {Mississippi Kitchen}
  16. Cinnamon Dolce Latte {Alphabet Soup}
  17. Rasberry Coffee Frappe {Better Homes and Gardens}
  18. Kid Zombie Iced Frappe {Susie QT Pies Cafe}
  19. Walnut Coffee {4th Sense Cooking}
  20. Low Calorie Mocha Mint Iced Coffee {Brie Brie Blooms}
  21. Skinny Starbucks Frappuccino {Recipe Rehab}
  22. Caramel Ribbon Crunch Frappuccino {Spoonful}
  23. Chocolate and Vanilla Eiskaffee {Diethood}
  24. Frozen Caramel Macchiato {Around My Family Table}
  25. Skinny Caramel Frappuccino {Averie Cooks}
  26. Creamy Boozy Iced Coffee {Be Foodie}
  27. Vietnamese Iced Coffee {Dukes and Duchesses}
  28. Light Mocha Cookie Coffee Frappe {K&K Test Kitchen}
  29. Peppermint Mocha Coffee Frappe {It’s Gravy Baby}
  30. Chocolate Cherry Jubilee Frappe {Peanut Butter And Peppers}
  31. Skinny Salted Caramel Mocha Frappuccino {Flour On My Face}

So who is going to have a coffee with me? :)
Tell me do you have some great recipes?

Nii, kes tuleb minuga kohvile?

Millised on teie lemmikud kohvi retseptid?

14 October 2015

Organize yourself [kord majja]

The worst thing at home, when you say your kids to clean up their room. I would propably look like this.

Kõige hullem asi kodus, on see kui palud lastel oma tuba koristada. Ma tõenäoliselt oleks  juba selline.
Well, almost every time when we are cleaning, I always try to organize kids stuff - pencils, books, LEGOs - is it even possible??
Few weeks ago I tried to organize them again, but yesterday I discovered that I am back in the beginning - all the legos are in one box, or even worse on the floor.

Peaaegu iga kord kui me siis lõpuks üheskoos koristame, üritan ma kuidagi sorteerida laste asju - pliiatsid, raamatud ja LEGOd - kas neid on üldse võimalik kuidagi sorteerida/organiseerida??

Paar nädalat tagasi ma taaskord püütsin neid sorteerida, kuid eile vaatasin, et olen taaskord alguses - kõik legod ühes kastis segamini, või veel hullem mööda tuba laiali.

My master plan is to organize them in one box! I don't have the time and budget to buy something great, just have to do things I have in home.
Cheap and easy -   maybe something like this!

Minu suureks missiooniks on nad siis sorteerida selles ühes kastis! Kuna eelarvet ja aega selleks ei ole, tuleb hakkama saada koduste vahenditega.
Lihtne ja odav - võibolla midagi sellist!


And I found that someone has already made lego labels - it would be great to but them into boxes, so children would know, where to put legos and how to sort them.

Ja ma leidsin interneti avarustest, et keegi on juba valmis meisterdanud lego sorteerimiseks sildid - hea moodus ja motivatsioon (?) lastele oma legode sorteerimiseks. Ma loodan.


You can have them in here 
Need sildid leiad sa siit
So we started to make our own lego sorter/organizer. We used:
Niisiis alustasime oma lego sorteerija tegemist, me kasutasime:
  • one box / pappkasti
  • comics / koomikseid
  • PVA glue / PVA liimi
  • scissors / kääre
  • paper / paberit
  • hot glue gun (missing from picture) / kuumaliimi püstolit


Then we started to cover the box with sheets of comics.

Alustasime pappkasti katmist paberi ja koomiksiga.


We added tabs to sort by colour. With hot glue gun we glued them to stay in place. And we are done!

Siis lisasime veel vahelehed, et saaks värvi järgi sorteerida. Kuumaliimi püstoliga liimisime vahelehed seinte külge kinni. Ja ongi valmis!


And the result / Ja tulemus
BEFORE / ENNE

AFTER / PÄRAST