01 November 2015

Father's Days is coming [Isadepäev on tulemas]

Every year our kids are doing cards for dad and I'm looking somekind on gift for him. The truth is, that the gift part is the most difficult. The cards are easiest.

I gathered here some great cards ideas and some thoughts of gift. Maybe you can find here something aswell.


Igal aastal on meie peres lapsed teinud isadepäevaks kaardi ning minule usaldatud siis kingiotsisimine. Kui kui aus olla, siis kingi otsisimine ongi kõige keerulisem. Kaardi meisterdamine on käkitegu.

Igaljuhul kogusin siia mõned toredad kaardi ideed ja mõtted, mida võiks kinkida. Võibolla leiate isegi siit mõne hea idee!


The cutiest gift from Anna Lutter
Kõige nunnum kink

This will suit to our dad.
Sobiks hästi meie issile

Last, but not least a mug cake from Table for two blog - easy suprise for dad's!
Viimaks, tassikook blogist Table for two - lihtne üllatus isale!
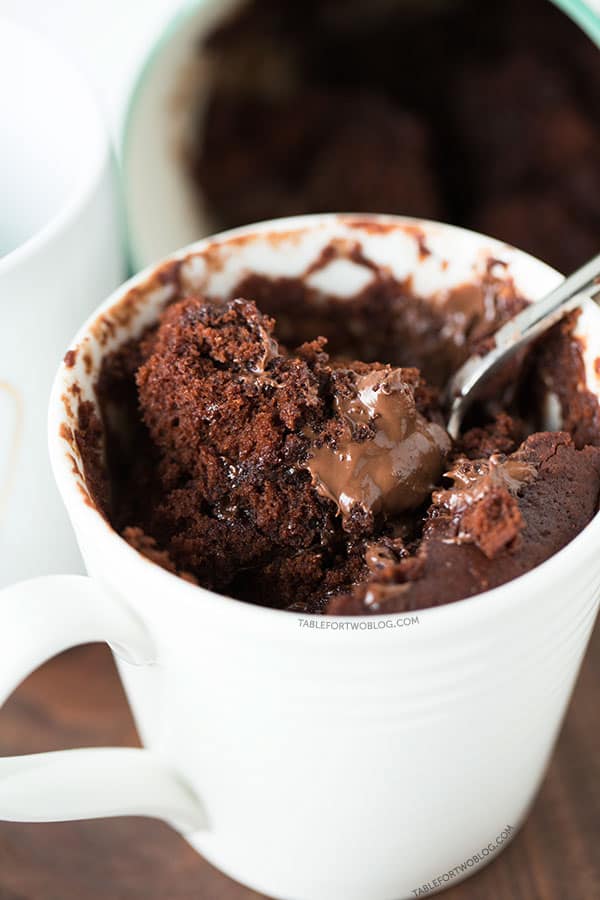

Ingredients/koostisosad:
¼ cup all-purpose flour/ veerand tassi jahu
2 tbsp. unsweetened cocoa powder / 2 tl kakaopulbrit
¼ tsp. baking powder / veerand tl küpsetuspulbrit
2 tbsp. granulated sugar (you can add 1 tbsp. more if you like it a bit sweeter) / 2 tl suhkurt
⅛ tsp. salt / veerand tl soola
¼ cup + 1 tbsp. milk / veerand tassi piima
2 tbsp. vegetable oil / 2 tl õli
1 tbsp. hazelnut chocolate spread / 1 tl pähkli šokolaadi võie

Instructions:
In a medium bowl, whisk together dry ingredients.
Whisk in the milk and vegetable oil until all ingredients are combined and batter has no clumps.
Pour batter into a microwave-safe mug. Mine was a 14-ounce mug. You want enough head space for the cake to rise without pouring over.
Add 1 tbsp. of hazelnut chocolate spread in the middle of the batter. Just drop it in the middle, no need to push it down and sink it in the batter.
Place a paper towel into the microwave and set the mug on top (this is to catch any batter if your mug cake overflows).
Microwave mug cake for 70 seconds on high level.
Carefully remove from microwave and enjoy!

Juhised:
Keskmises kausis sega kõik kuivained. Lisa piim ja õli ning sega ühtlaseks massiks. Vala saadud mass mikrolaineahju-kindlasse tassi. Sobilik 400 ml tass - suurem tass on vajalik koogi kerkimiseks. Šokolaadivõie lase teelusikalt kukkuda massi keskele, ei ole vaja seda "uputada" või kinni matta.
Aseta mikrolaineahju, tassi alla tükk majapidamispaberit - see püüab üle tassi kerkivat tainast, juhuks kui peaks nii minema. Kuumuta tassi 70 sekundit kõrgemail kuumusel.
Võta tass ettevaatlikult mikrolaineahjust välja ja naudi!

31 October 2015

Table centerpieces for a special event [lauakaunistused eriliseks sündmuseks]

Few days ago, we had one beautiful evening with colleagues and I was organized it. My favorite thing of all is decorating the evening!

It all begun with a walk in woods. I gathered "some" moss and "few" wood pieces. Im glad that nobody saw me - it is not okay to pick woods in early Sunday morning :)
Then I cleaned the moss from thorns.

Mõned päevad tagasi, oli meil üks kena õhtu kolleegidega ja mina sain pearolli organiseerimisel. Muidugi kõige nauditavam osa oli peo dekoreerimine.

Algas kõik jalutuskäigust metsas. Korjasin "veidi" sammalt ja "mõned" puujupid. Õnneks, keeg ei näinud mind - ei ole vist väga normaalne pühapäeva vara hommikul tassida puid metsast autosse :)
Ja siis alustasin sambla puhastamist okastest - nii palju kui viitsisin.


Then I took some old newspapers and soft wire. I made some balls and afterwards added moss with 
thread.

Vanast paberist tegin pallikesed, neid vormisin pehme traadiga. Hiljem kerisin niidiga sambla ümber.
Ofcourse I needed something more to decorate the woods. I painted some cones with spray into white. I gathered red chokeberry leaves and berries and also made balls from newspaper. Afterwards just sprayd them into gold.

Muidugi oli veel kaunistuseks vaja erinevaid materjale. Värvisin mõned käbid valgeks. Aroonia punased lehed ja marjad sättisin samamoodi pallikeseks ning spreiga värvisin kuldseks.


And with hot glue gun all things onto one piece of wood. Beautiful, isn't it?
Well, the truth is that I made these table arrangemets 8 pieces. But only one left for my house.

Kõik kaunistused liimisin kuumaliimi püstoliga puujupi külge. Kaunidus, eksole?
Kui aus olla, siis tegelikkuses tuli selliseid lauakaunistusi kokku 8, aga ainult üks meie kodu jaoks.

27 October 2015

Meanwhile [vahepalaks]

As I am working on bigger project, it is great to see my sons work in school.. it seems that he has got at least something from me..
Kuna ma ise hetkel töötan suurema projekti kallal, siis on vahelduseks tore näha poja töid koolis.. tundub, et midagi on ikka minult ka päritud..

24 October 2015

Christmas is coming.. already? [Juba tulevad jõulud?]

My pinterest is full of christmas ideas - from cooking, decorations and last-minute-gifts. And it's October?! Really? In October? I haven't finished my Halloween decorations yet and already christmas are every where!

Minu Pinterest tahvel on umbselt täis erinevaid jõulu ideid - alates erinevatest söökidest, dekoratsioonidest ja lõpetades viimase-minuti-kingitustega. Ja on ju alles oktoober?! Nagu päriselt? Oktoobris? Ma pole isegi oma halloweeni kaunistusi lõpetanud ja juba on kõik kohad jõulukraami täis.

Photo from Pinterest

Well, true, it's only like 60 days til Christmas and I already started to knit some cozy presents, but I dont't think what to cook or how to decorate my house.

I even thought to try Haapsalu shawl, I even have a book in my shelf, but not yet. But I anvy people who can manage it. Here is Anete's beautiful shawl - you can her blog here.

Jah, muidugi on nagu mingi 60 päeva jõuludeni ja ma isegi alustasin juba ühe sooja ja mõnusa kingi kudumisega, aga ma veel kindlasti ei mõtle sellele, mida ma siis süüa teen või kuidas täpsemalt kodu kaunistan.

Seoses salliga, siis isegi mõtlesin korra, et proovin Haapsalu salli kudumist, sest raamat seisab juba aastaid riiulis, aga siiski mitte. Aga kadestan inimesi, kes sellega hakkama saavad. Siin on pilt Anete imeilusast sallist - tema blogi leiate siit.

Photo from Anete's blog

This year I just like to spend much time with  my family and gather some important people in my life  and have a great christmas dinner. I think gifts are not so important, but just to remember who are truly friends and important people in our lives.

Therefore you will see a lot of Christmas table decor photos and ideas.

Sel aastal tahaks rohkem rõhku panna oma perele ja olla koos toredate ja oluliste inimestega. Lihtsalt saada korra ühise laua taga kokku. Kinkimine ehk polegi enam nii oluline, aga just inimesed ise, sest reaalsust ja üksteisele silma vaatamist on järjest vähem.

Seepärast on peagi siin blogis ka palju pilte ja ideid tulemas..

Photo from Pinterest

21 October 2015

For a princess [printsessile]

One little princess is born and we went to see her. Therefore I made lovely owl mobile for buggy. As you can see, I used my owl pattern (see the previous post), skipped the wings and added just some wooden beads and elastic drawstring.

Super easy, it took only 2 hours to make it, but the result is amazing!

19 October 2015

DIY - Adorable owl free crochet pattern [Tee-ise - armas öökull muster]

I made this pattern over a year ago, but it is still my favourite pattern all time. Super easy and fast. Do it yourself or give it to your kids - you all can manage, if you know the basics of amigurumi.

Please notice! This pattern belongs to Kipre&Pähkla designers Kaie Pranno. Any kind of copying, reproducing or sharing is forbidden. Only for personal use.

Skill level – beginner
Finished size – The adorable owl is about 7 cm (2.75”) tall (if using similar yarn)

Supplies
1. Yarn – the example ise crocheted with Steinbach Wolle Capri (100% Cotton;50g = 125m; 1.75 oz = 136 yds)
Color A – pink
Color B – dark pink
Color C – light beige
2. Polyester fiberfill
3. Crochet hook 3,0 mm (U.S D or in accordance with the yarn you use)
4. Stitch marker
5. Black cotton thread
6. Darning and embroidery needles

About the pattern 
Work in continuous rounds. Do not join or turn unless otherwise instructed. It would be wise to use a stitch marker and place it in the first stitch of the round to mark the beginning of it. Move the marker up to the first stitch of the next round after finishing the previous one. If you need to change color, do it always at the end of the previous round. Start the last stitch of the round with the old color. Change the color right before you draw through all loops on hook to complete stitch. You can easily sew the toy together when you leave each piece a long yarn tail.

Abbreviations: 
Ch = chain
Sc = single crochet
Sl st = slip stitch
St (s) = stitch(es)
Inc = increase
Dec = decrease 3

PATTERN
OWL BODY 
Color A
Magic ring with 6 sc (6)
Rd 1: 2 sc in each st (12)
Rd 2: (1 sc, 2 sc in next st) rep 6 times (18)
Rd 3: (2 sc, 2 sc in next st) rep 6 times (24)
Rd 4: (3 sc, 2 sc in next st) rep 6 times (30)
Rd 5: (4 sc, 2 sc in next st) rep 6 times (36)
Rd 6: (5 sc, 2 sc in next st) rep 6 times (42)
Rd 7 – 10: 1 sc in each st (42)
Rd 11: (5 sc, dec) rep 6 times (36)
Rd 12: 1 sc in neach st (36)
Rd 13: (4 sc, dec) rep 6 times (30)
Rd 14: 1 sc in each st (30)
Rd 15: (3 sc, dec) rep 6 times (24)
Rd 16 – 21: 1 sc in each st (24)
Fasten off and leave long yarn tail for sewing.

Take Color B and embroidery needle. Embroidery V-stitches to owl’s belly. Start on 9th row (counting from bottom to top) and leave 4 st apart.

Stuff the body with polyester fiberfill and sew the top edge together.

WINGS (make 2)
Color A
Magic ring with 6 sc (6)
Rd 1: 2 sc in each st (12)
Rd 2 – 5: 1 sc in each st (12)
Rd 6: (1 sc, dec) rep 4 times (8)
Rd 7: (dec) rep 4 times (4)
Fasten off and leave long yarn tail for sewing. Sew the wings onto a body.

EYES (make 2) 
Color C
Magic ring with 6 sc (6)
Rd 1: 2 sc in each st (12)
Close the ring with sl st to next st.
Fasten off and leave long yarn tail for sewing.
Sew the eyes onto a body.

FINISHING 
Stitch on face and make ears tassels. To make tassels cut out the yarn strings (same height). Take your crochet hook and put it through the stitches. Pull all the strings through, now you have large loop. Put the hook away. With your finger, pull the strings through loop. Pull the loop tight. Trim the strings.

Your owl is done!

Feel free to share your owl with me! If you have any questions, you can leave comment here or write me kaie.pranno(ät)gmail.com

18 October 2015

Hats for two [mütsid kahele]

Cold weather comes always unexpected, so it was this year. And each year, there is huge problem - all hats, gloves and scarfs are either too small or just weared out.
I usually try to crochet everything, but this year I felt like knitting :)

Külmad ilmad tulevad alati ootamatult, pole erand ka see aasta. Ja iga aasta kordub üks ja see sama probleem - kõik mütsid, kindad ja mütsid kas on väikseks jäänud või lihtsalt koledaks kantud.
Üldiselt olen kõik asjad püüdnud heegeldada, kuid see aasta on kudumine kuidagi rohkem meeldima hakanud :)

So here they are. Girl's hat is knitted with lace, boy's hat is made with moss stitch.

Siin nad on! Tüdruku müts on tehtud lihtsa rombimustriga, poisi oma aga pärlkoes.

Well, there should be also third hat. Yeah, true, I made the third hat aswell, but few days ago we made a bonfire and you know - if you go to close to fire, you might get some sparks holes in your clothes - well the new hat got some sparks hole and now I need to knit new one :)

Muidugi peaks olema ju ka kolmas müts. Tõsi, kudusin kolmanda mütsi ka, kuid mõned päevad tagasi tegime lõket õue peal ja on ju teada, et kui liialt ligidal seista lõkkele, siis võid oma riietele saada sädemeaugud, nii juhtus ka tuttuue mütsiga. Nüüd tuleb lihtsalt uus müts kududa :)